Chapter 7 of 11 · 20 min
Opening stock, and keeping it right
Put a real number against every item in every branch, then set up the two habits that keep those numbers true.
Every item shows a real quantity in each branch, every change to that quantity carries a reason, and the shop tells you before a shelf runs out.
Your catalogue is finished, which means the shop knows what you sell. It does not yet know how much of it is standing on your shelves. Those are two different facts and the second one has to be entered by hand, once, at the start.
Where the numbers live
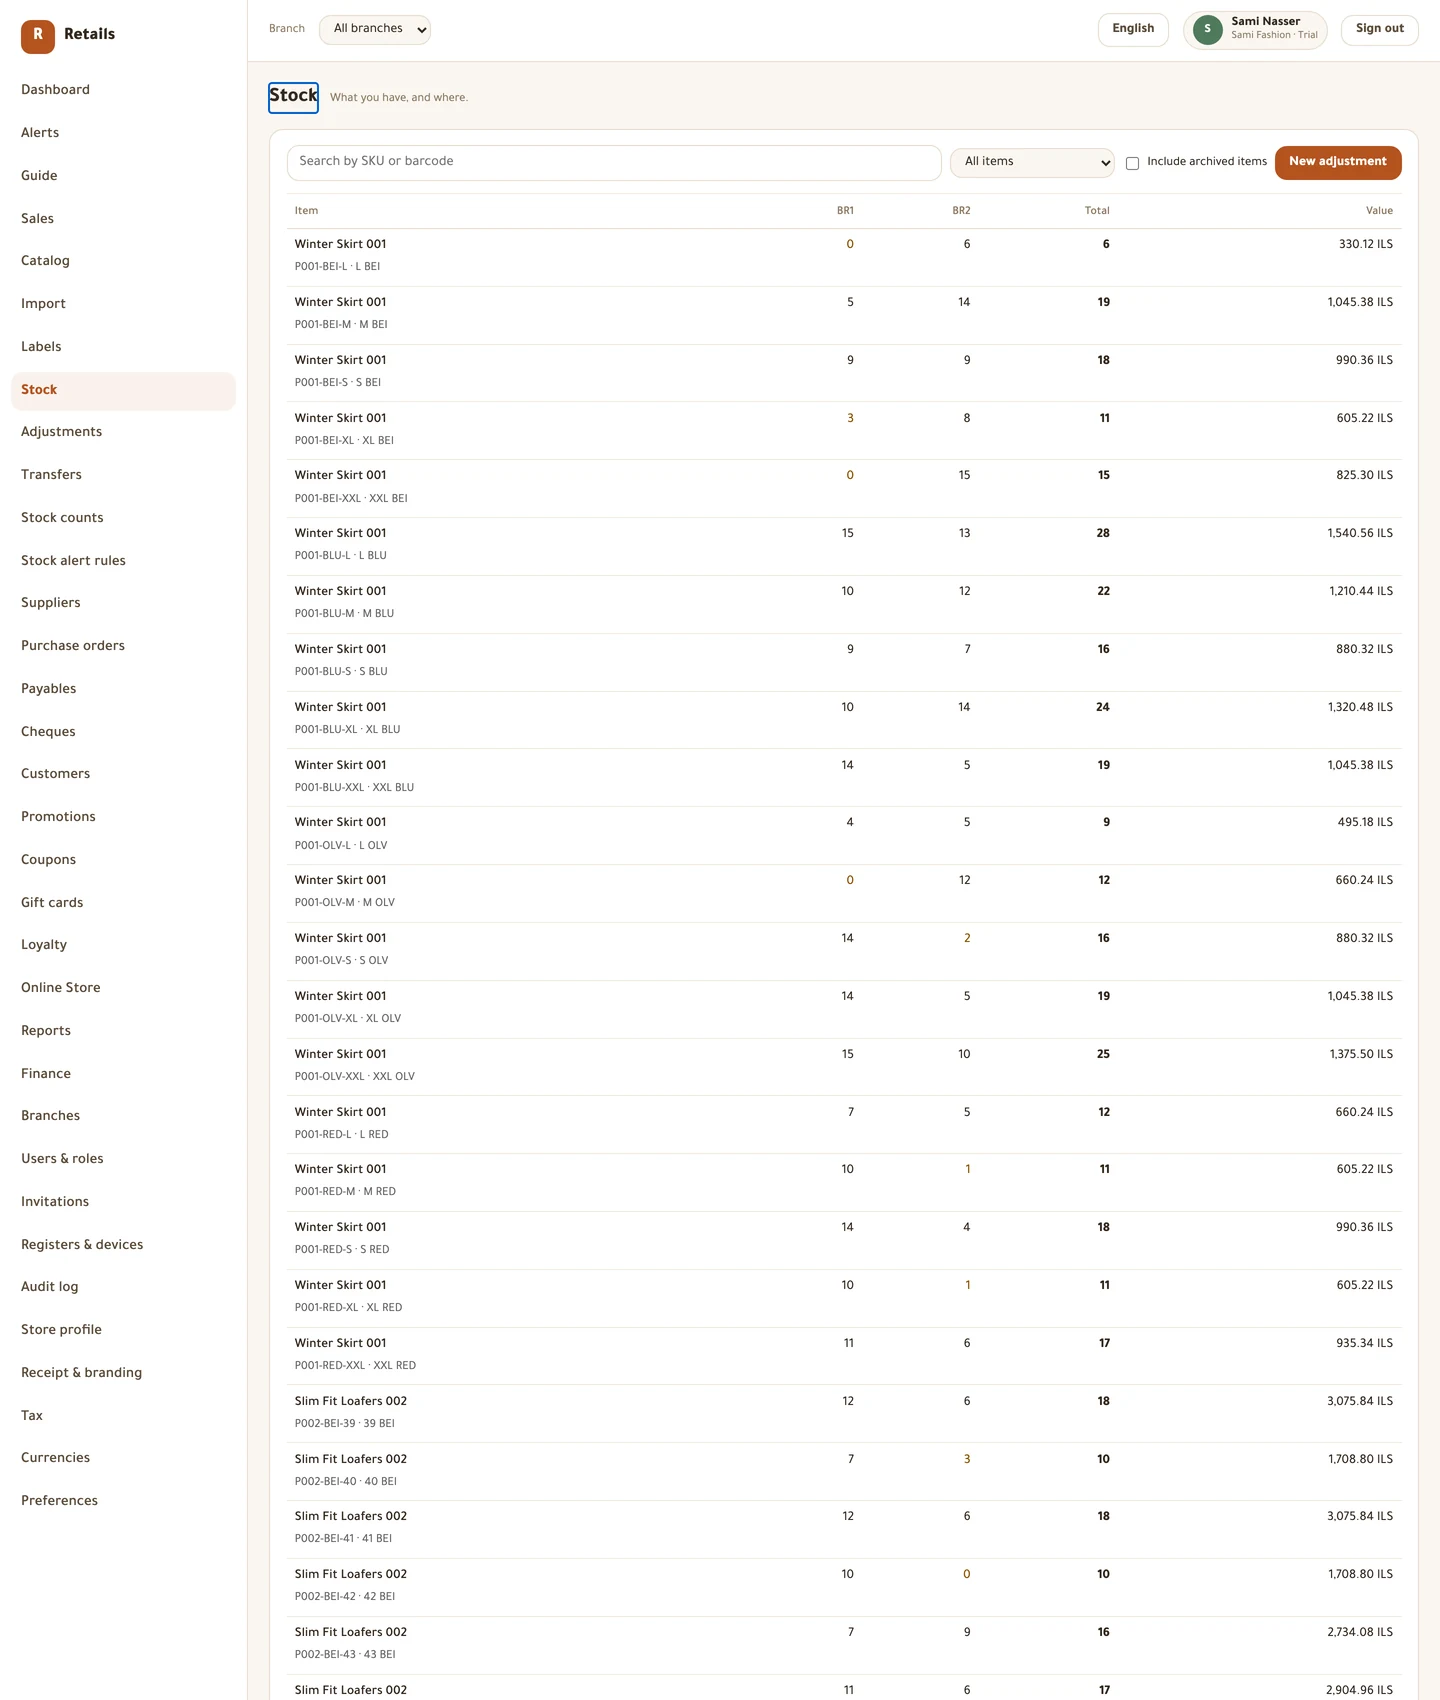
Stock is one row per item and one column per branch. That shape answers the question you will actually ask — where is it — instead of making you hold three branch lists in your head.
Search by SKU or barcode, or scan straight into the box. The Filter next to it narrows to At or below threshold, Out of stock or Negative, which is how you find the rows that need work.
A negative row gets a Why is this negative? link underneath it. Open it and you see the movements that drove it below zero, newest last, with the document number beside each one.
Do this
- Open Stock in the menu.
- Scan a barcode or type a SKU into Search by SKU or barcode.
- Set Filter to Negative and check that nothing is listed before you go live.
Type in your opening figures
There are three ways a quantity gets in: you count and type it, you scan the shelf, or a supplier delivers. For your first load, type it. It is the fastest and it is exactly what the reason Correction means.
Do one branch at a time. Count a section of the shop, type it in, save, then move to the next section. A single adjustment holding two hundred lines is one mistake away from being unpickable.
Do this
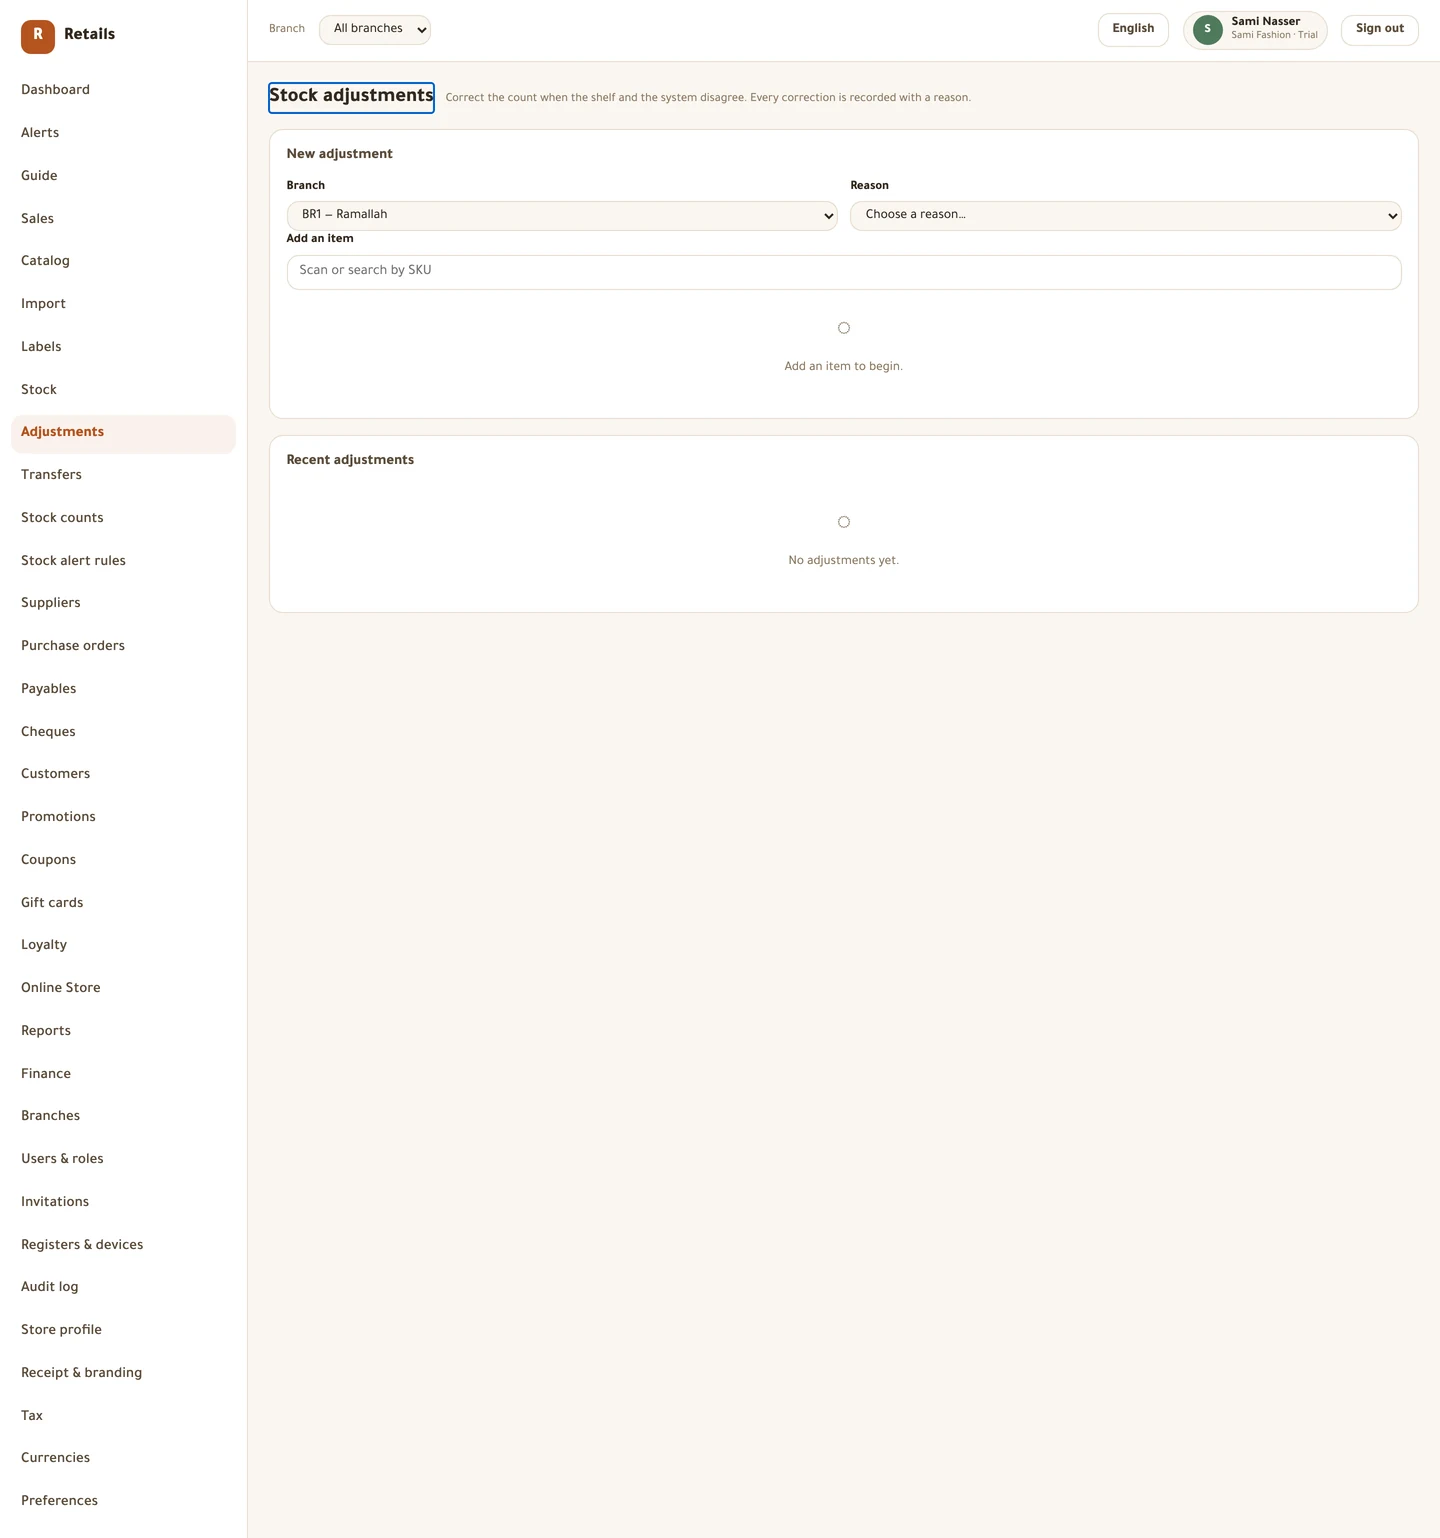
- Open Adjustments in the menu.
- Choose the Branch first — changing it later clears everything you have typed.
- Pick a Reason. For a first load that is Correction.
- Scan or search in Add an item and pick the item from the list.
- In the Change column type the change, not the new total:
12adds twelve. - Read the Result and Cost impact columns.
- Press Save.
Why the reason is not optional
Stock that changes without a reason is stock nobody can explain three months later. The inventory report groups adjustments by reason — that is your shrinkage report — and free text cannot be grouped. So the list is fixed and short.
Correction means the books were wrong; use it for the opening load. Damaged is torn, stained, unsellable. Lost is the theft column: it should be here and it is not. Found is the opposite. Expired is rare in apparel and common in whatever else you carry.
Other exists, and picking it makes the Note field appear and become required. That note is what the shrinkage report prints instead of a code, so write something a stranger could read.
Counting a shelf with a scanner
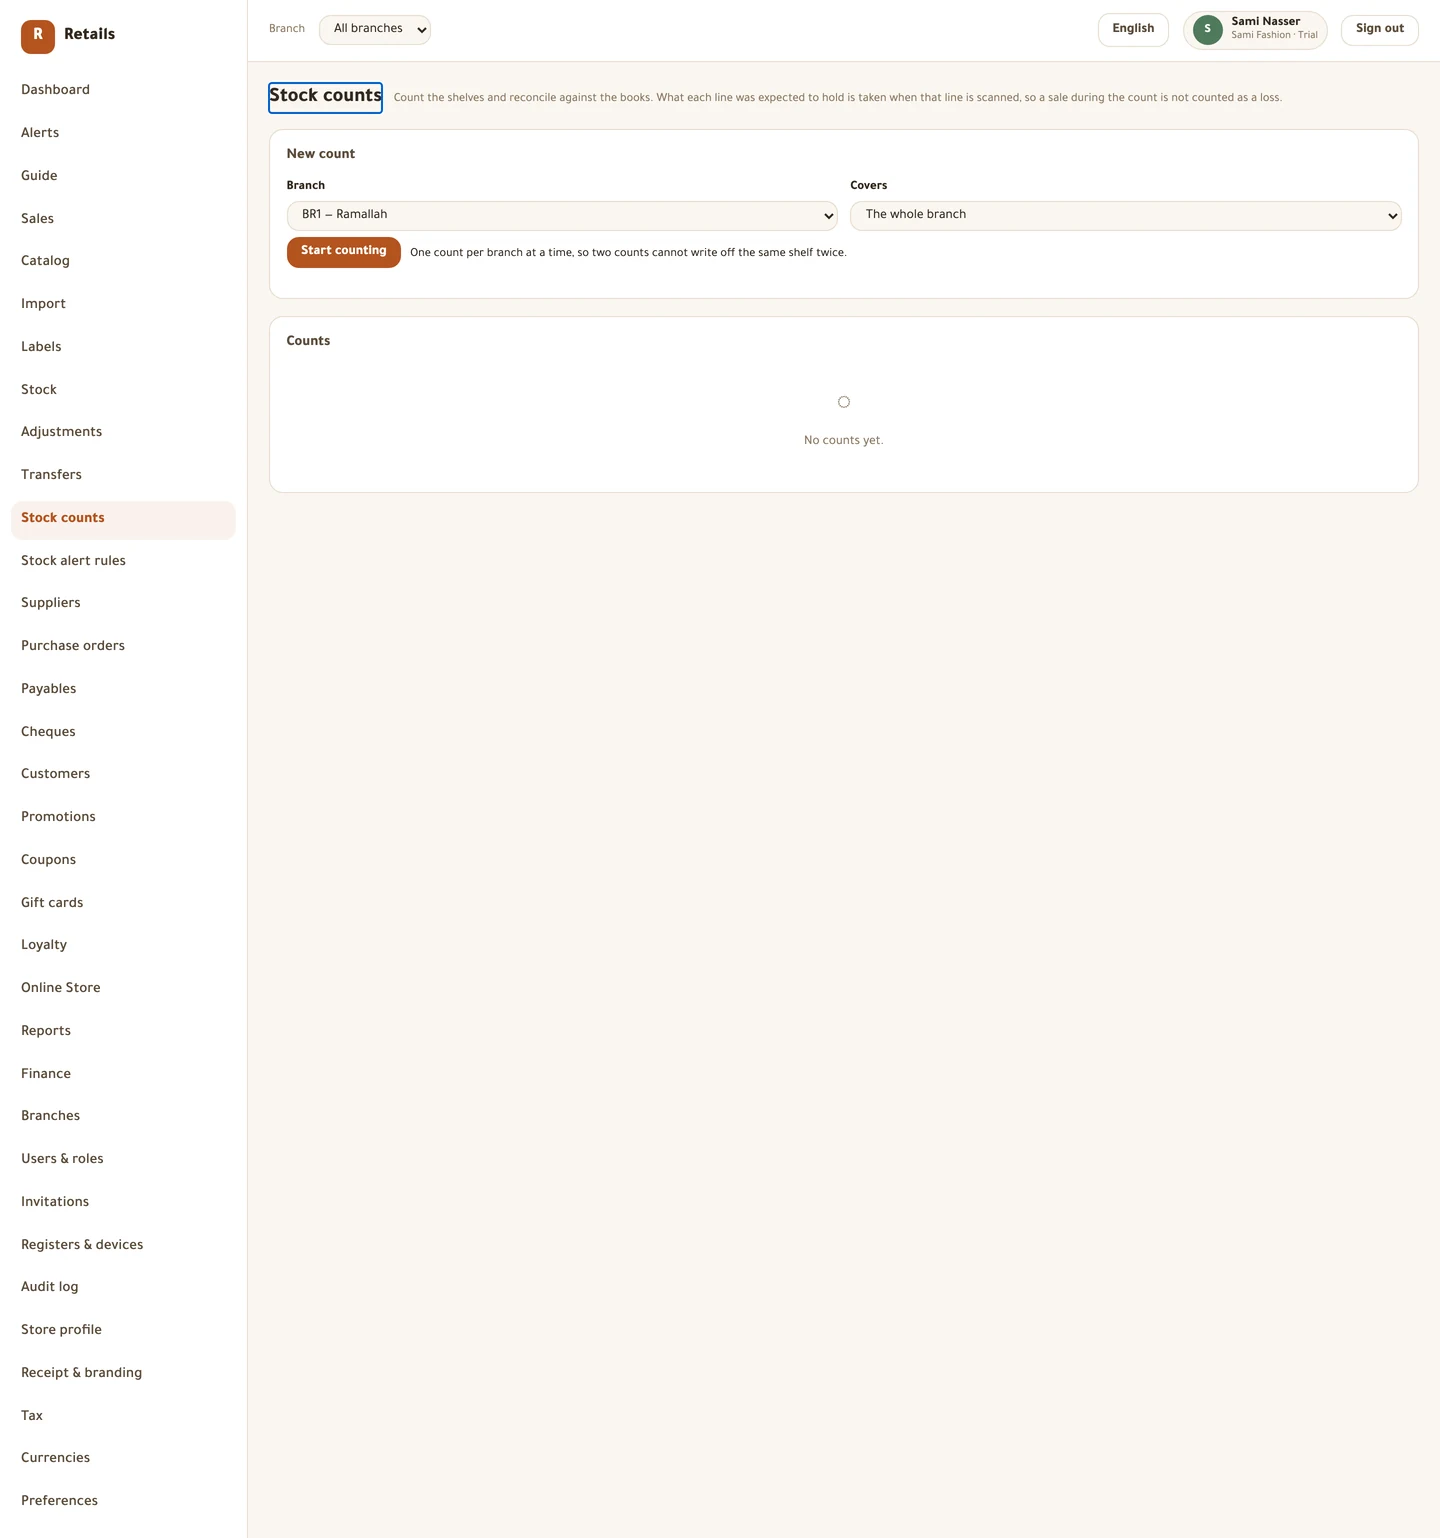
A stock count is the same job as an adjustment done with a scanner instead of a keyboard, and it is what you will use from now on. Each scan adds one, so two people counting the same rail add up rather than overwrite each other.
What each line was expected to hold is taken at the moment that line is first scanned, not when the count started. A sale rung during the count is therefore not read as a loss.
Do this
- Open Stock counts in the menu, then New count.
- Choose the Branch and what it Covers — the whole branch, one category or one brand.
- Press Start counting and scan the shelf.
- Press Finish counting when the section is done.
- Check the Difference and Value figures on the review screen.
- Press Approve and post.
Moving stock between branches
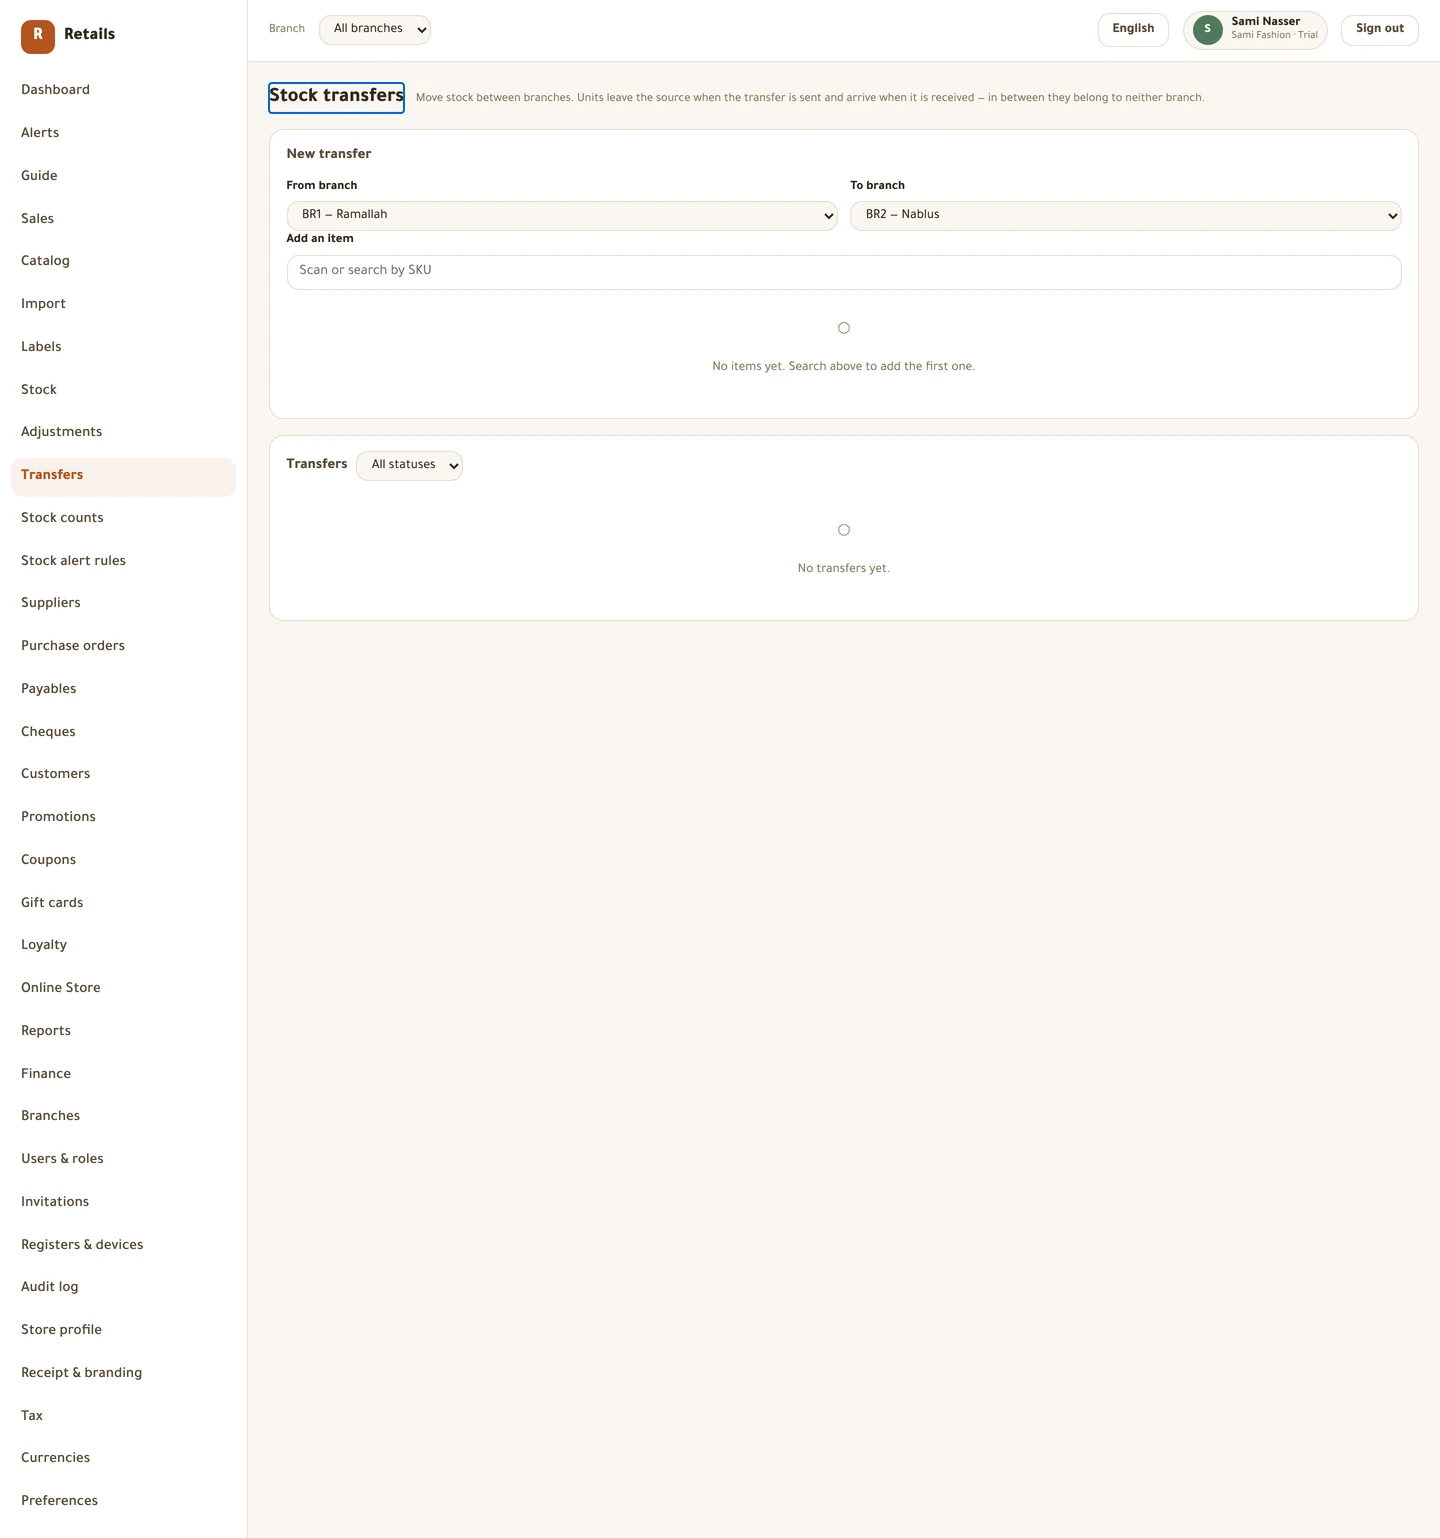
A transfer is three steps: draft, send, receive. Sending deducts the units from the sending branch straight away and allocates the transfer number. Until somebody receives them the units belong to neither branch — they are in transit and counted nowhere.
Receiving asks you to count each line. That is deliberate; a screen with one receive all button is a screen where nobody ever counts. If a line arrives short, or something turns up in the box that is not on the paperwork, add it — an unlisted item left off the record is stock on a shelf that exists in no record at all.
When what arrived does not match what was sent, the sending branch decides what happened before the transfer can close: They are at the receiving branch, They are at the sending branch, or Written off — the items are lost.
Do this
- Open Transfers in the menu, then New transfer.
- Set From branch and To branch.
- Add items and type how many in the Send column.
- Press Save draft now, or Send when the box is packed.
- At the far end, open the transfer and press Receive.
- Count each line into Received, and add anything unlisted.
Getting told before a shelf runs out
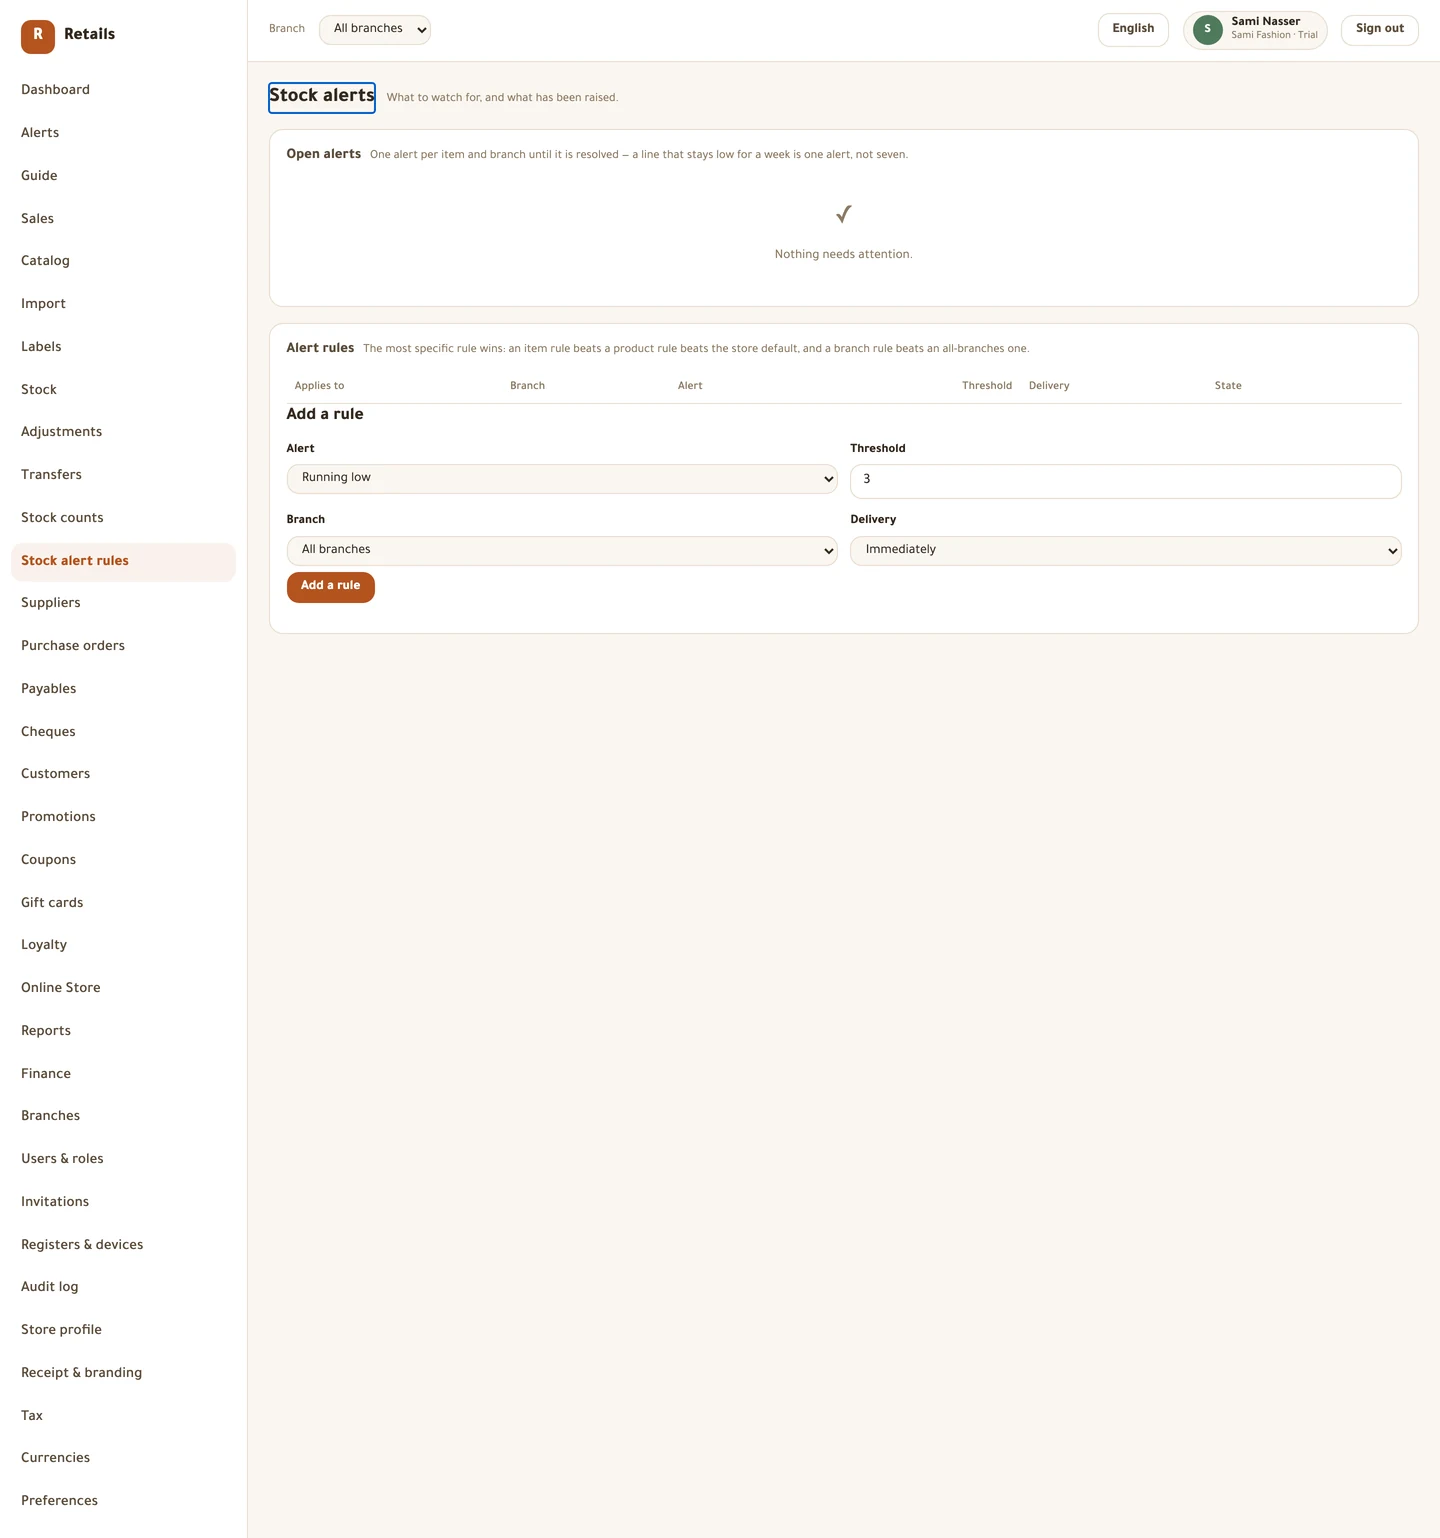
Stock alert rules is where you say what counts as low. Add a rule, point it at everything or at one product or one item, set the Threshold, and choose one branch or all branches. The most specific rule wins.
Negative stock does not need a rule — it is raised on its own, because it is a different problem with a different fix and folding it into ordinary reorder noise would hide a real oversell.
Raised alerts appear under Alerts, one per item and branch until it is resolved. A shelf that stays low for a week is one alert, not seven, and a restock closes it by itself.
Do this
- Open Stock alert rules in the menu.
- Press Add a rule.
- Choose what it applies to and set the Threshold.
- Pick a Branch, or leave it at All branches.
- Save, then open Alerts to see what it raises.
Before you move on
- Every branch has a real quantity against every item
- Opening figures entered as an adjustment with the reason Correction
- You know the Change column takes the change, not the new total
- Stock filtered by Negative and nothing listed
- At least one low-stock rule saved, and Alerts opened once
- You know Alerts are in-app only — nothing is emailed
Every picture on this page is a photograph of the real screen, taken from a running store.