Chapter 5 of 11 · 20 min
Categories, brands and your first product
Build the shelves, then put the first thing on them.
You have a category tree and a brand list, at least one product filed under both, and you know how to bring a whole spreadsheet of them in at once.
Categories are the shelves of your shop — Men › Shirts › Formal. Brands are a separate list. A product has one of each, and both are optional, but a catalogue with no categories is a catalogue nobody can search.
Shelves before stock
Do this before you create products. The product form has a Category and a Brand picker, and if the lists are empty the pickers are empty — the screen offers you a link to go and create some, which is a detour you can skip by doing it now.
The categories screen has no entry in the side menu yet. Reach it at /catalog/categories, or from the No categories yet — create some link under the picker in the product editor.
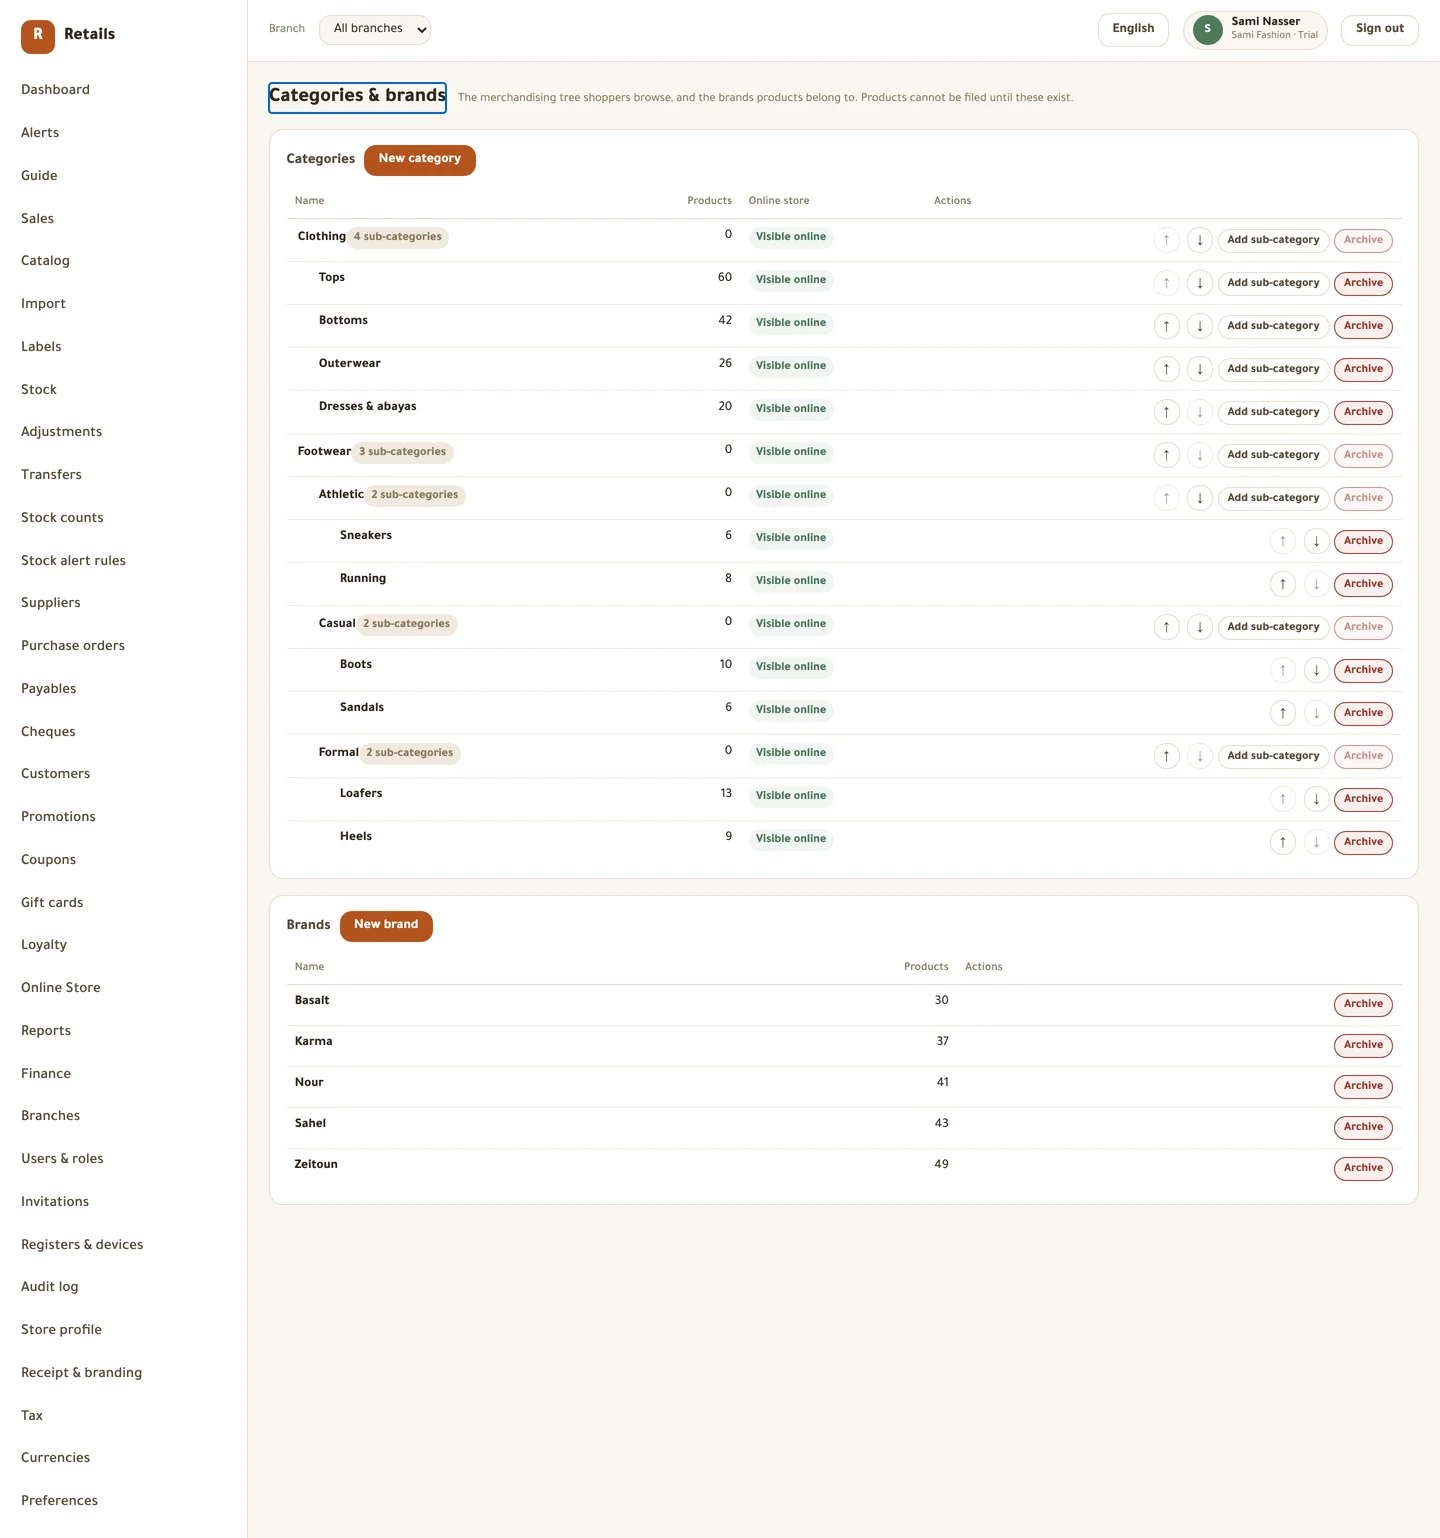
Build the category tree
Three levels deep, no more. Men › Shoes › Sneakers is the shape it is built for.
Do this
- Open Categories & brands and press New category.
- Fill in Name (English) and Name (Arabic). Both are required — the name is shown to staff and shoppers in their own language.
- Leave Sits under on Top level for a top-level shelf, or pick a parent.
- Leave Show this category in the online store ticked unless you want it hidden.
- Press Save.
- Press Add sub-category on a row to go a level deeper.
- Reorder with Move up and Move down, or drag a row within its own parent.
Brands
The same screen, lower down. Brands are flat — no tree, no parents.
Do this
- Press New brand.
- Fill in Name (English) and Name (Arabic), then press Save.
Archiving a category
There is no delete here either. Press Archive and the screen deals with what is filed under it.
A category that still has sub-categories is refused — archive or move them first. A category that has products makes you choose where those products go: pick another category under Move products to, or choose Leave them uncategorized. You have to choose one; it will not decide for you.
Your first product
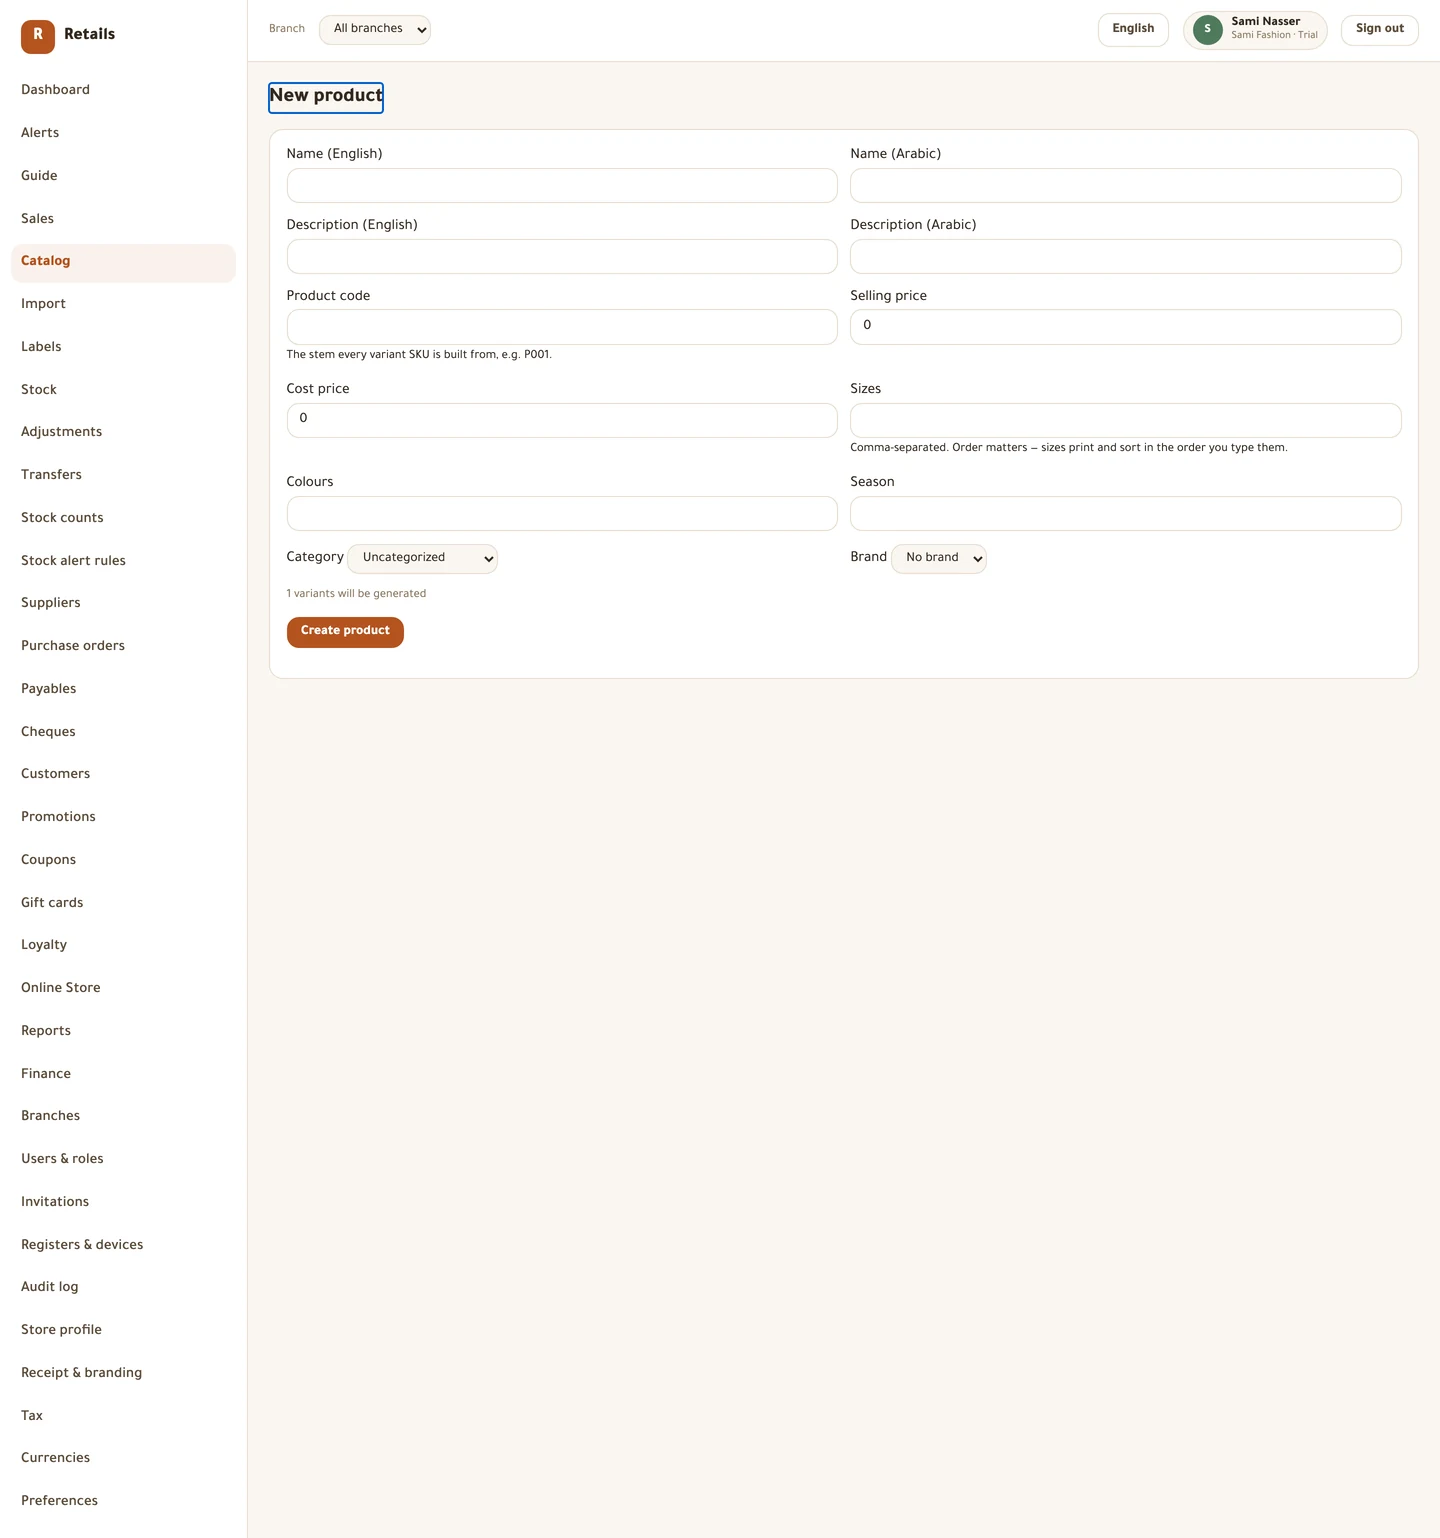
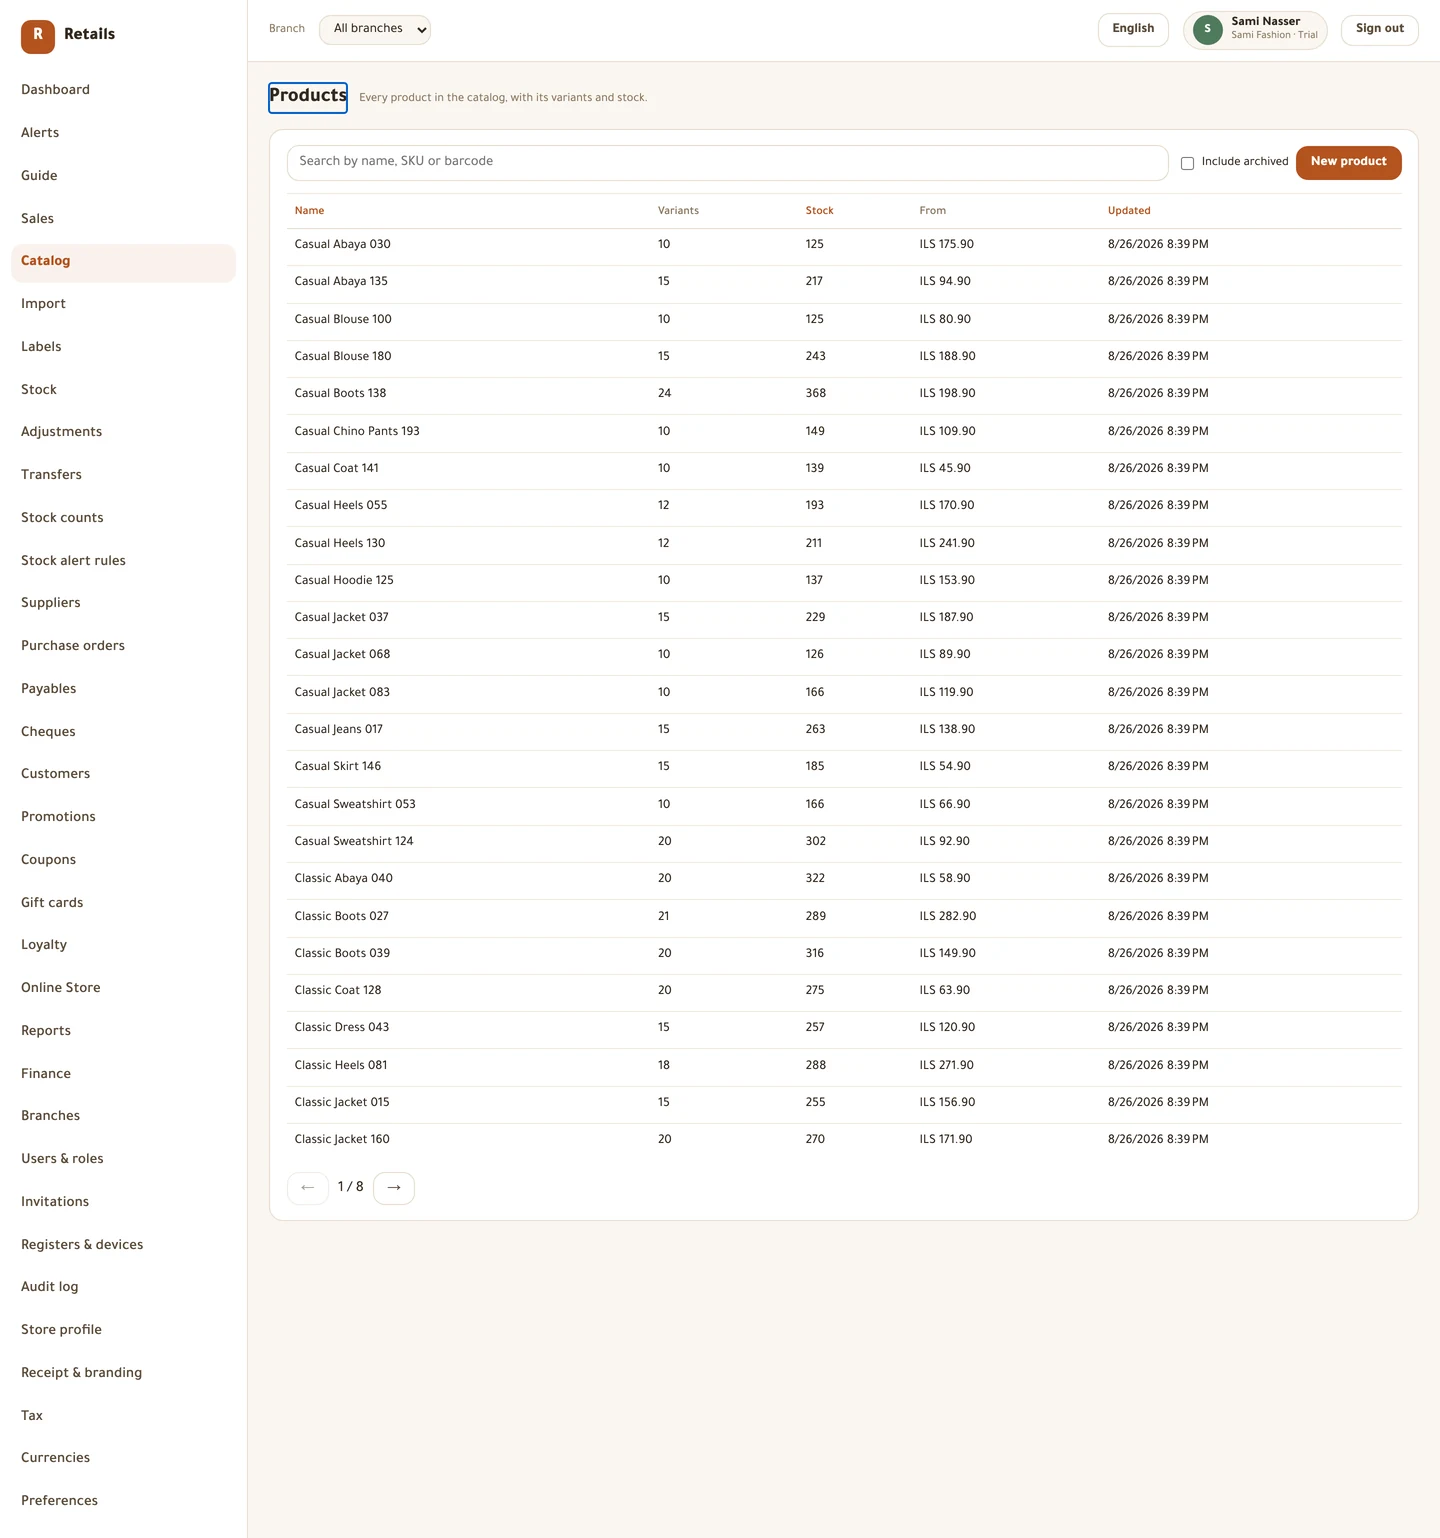
Open Catalog from the side menu — it lands on the product list — and press New product.
Everything on this form except the two axis boxes describes the product as a whole. The two axis boxes, Sizes and Colours, build the grid of things you actually sell, and they are chapter 6. If this first item has no sizes or colours — a belt, an accessory — leave both empty and you get one sellable unit.
Do this
- Fill in Name (English) and Name (Arabic). A product named only in English is a product an Arabic-speaking cashier cannot find.
- Fill in Description (English) and Description (Arabic) if you want them.
- Type a Product code — the stem every variant code is built from, e.g.
P001. Up to 24 characters. - Set the Selling price and the Cost price.
- Pick a Category and a Brand.
- Type a Season if you use them, e.g.
SS26. - Press Create product.
Price, cost and tax
The selling price is what the customer pays, tax included, unless you switched the store to tax-exclusive in chapter 2.
The cost is what you paid, and it is what every margin report is built on. A product with no cost is left out of the margin figures and listed separately, rather than counted as pure profit — the dashboard has an alert for exactly that.
Finding things again
The product list searches by name, SKU or barcode, and sorts by name, stock or last updated. Tick Include archived to see products that have been taken off sale.
Bringing a whole catalogue in
For a shop that is already trading, typing two hundred products in by hand is not the plan.
Do this
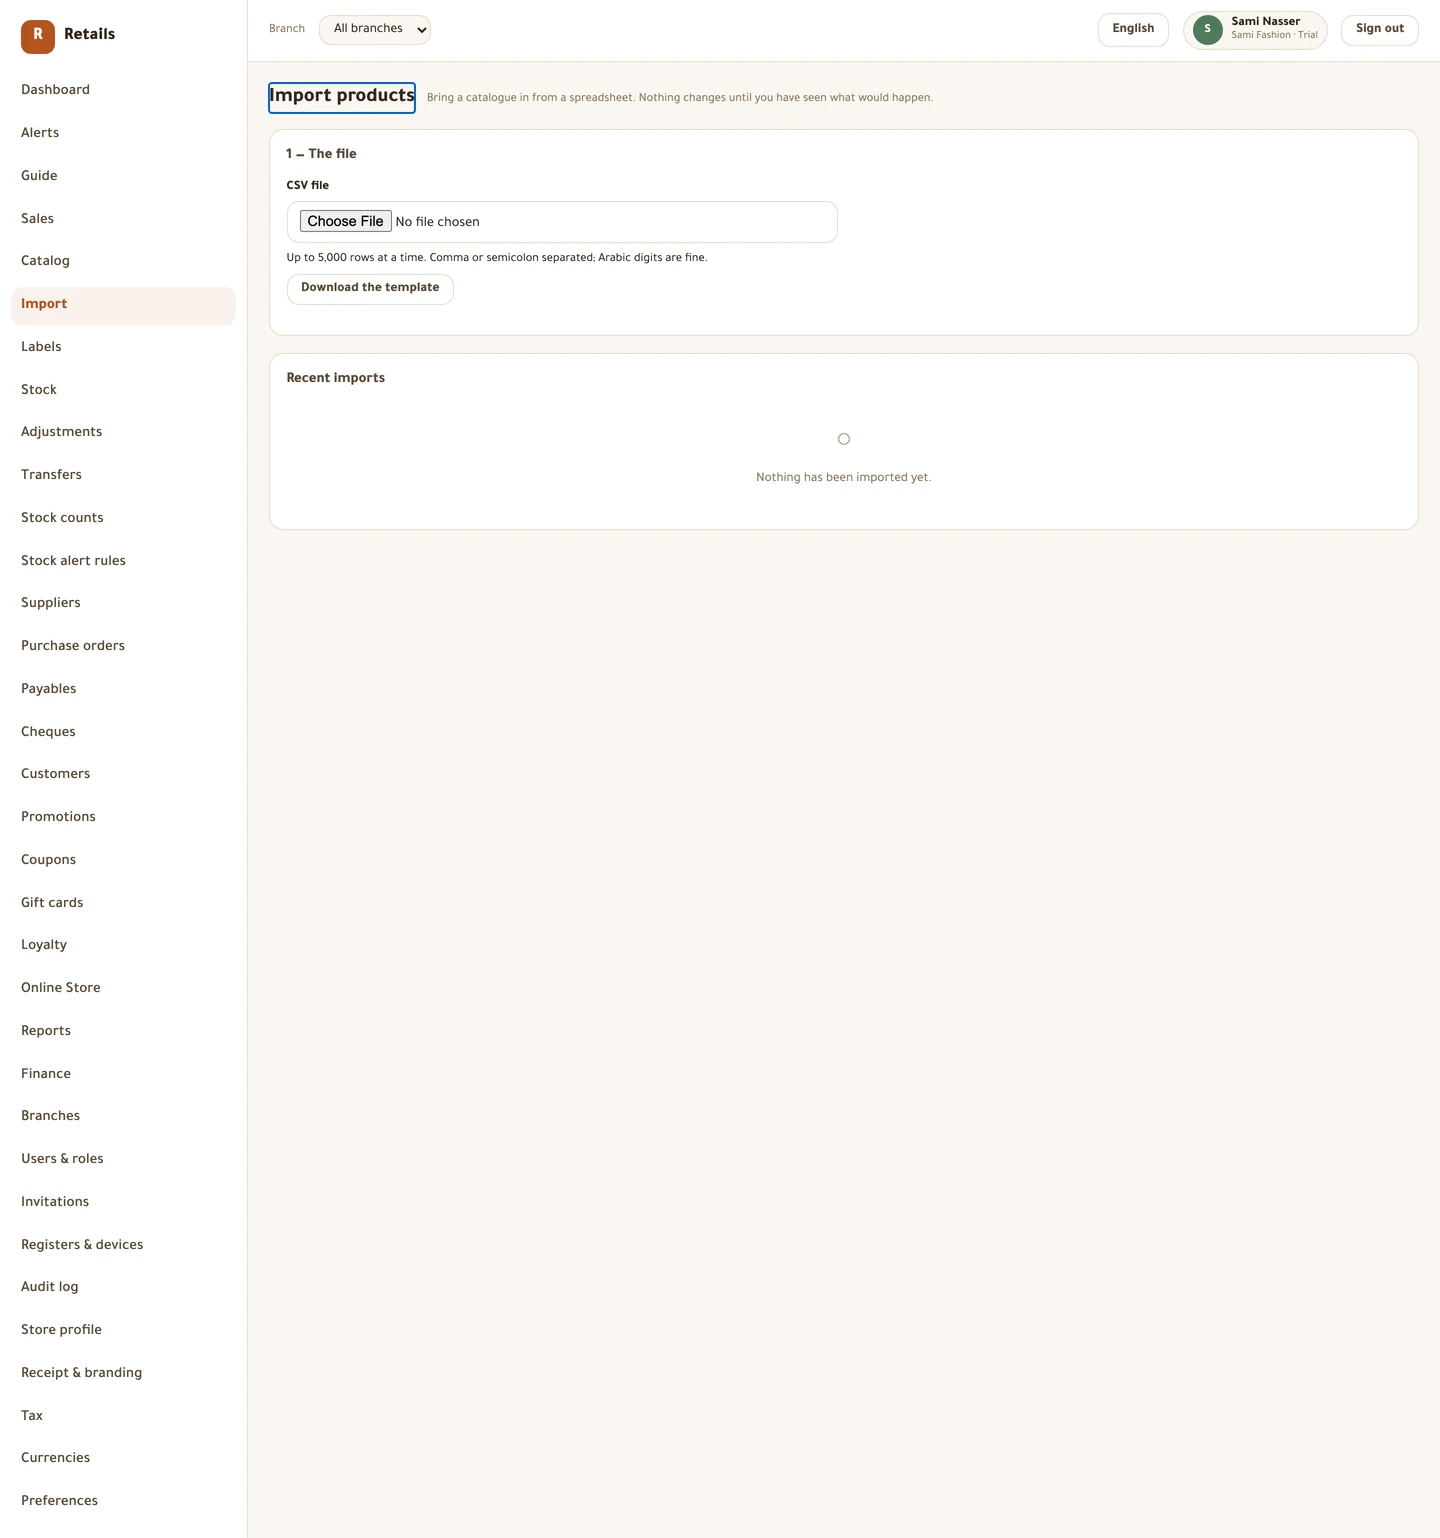
- Open Import and press Download the template. It has the columns in the shape the importer expects.
- Fill it in a spreadsheet and save it as CSV. Up to 5,000 rows at a time; a bigger file is refused outright rather than cut short, so split it.
- Upload it. Nothing is written yet.
- Read What this would do: how many rows are new, how many are updates, and how many cannot be imported and why. Correct the column mapping if it guessed wrong.
- Press Import and confirm. Rows with a problem are skipped and the rest go in.
- Press Download the failed rows, fix them in that file, and import it on its own.
Before you move on
- A category tree exists, no more than three levels deep, named in both languages
- Your brands are entered
- At least one product exists, filed under a category and a brand
- Every product has a cost price as well as a selling price
- You have run one import as a dry run and read what it said it would do
- You know that a price cannot be edited after the product is created
Every picture on this page is a photograph of the real screen, taken from a running store.