Chapter 3 of 11 · 15 min
Branches and registers
Open the places that hold stock, then pair a till to a device so it can sell.
Every shop and warehouse you trade from exists with the right code and timezone, and at least one register is paired to a real device and syncing.
A branch is a place that holds stock. A register is a till inside that branch. A POS device becomes a register by typing a pairing code, once.
Create a branch
Get the code right first. Everything else on this form can be edited later; the code cannot.
Do this
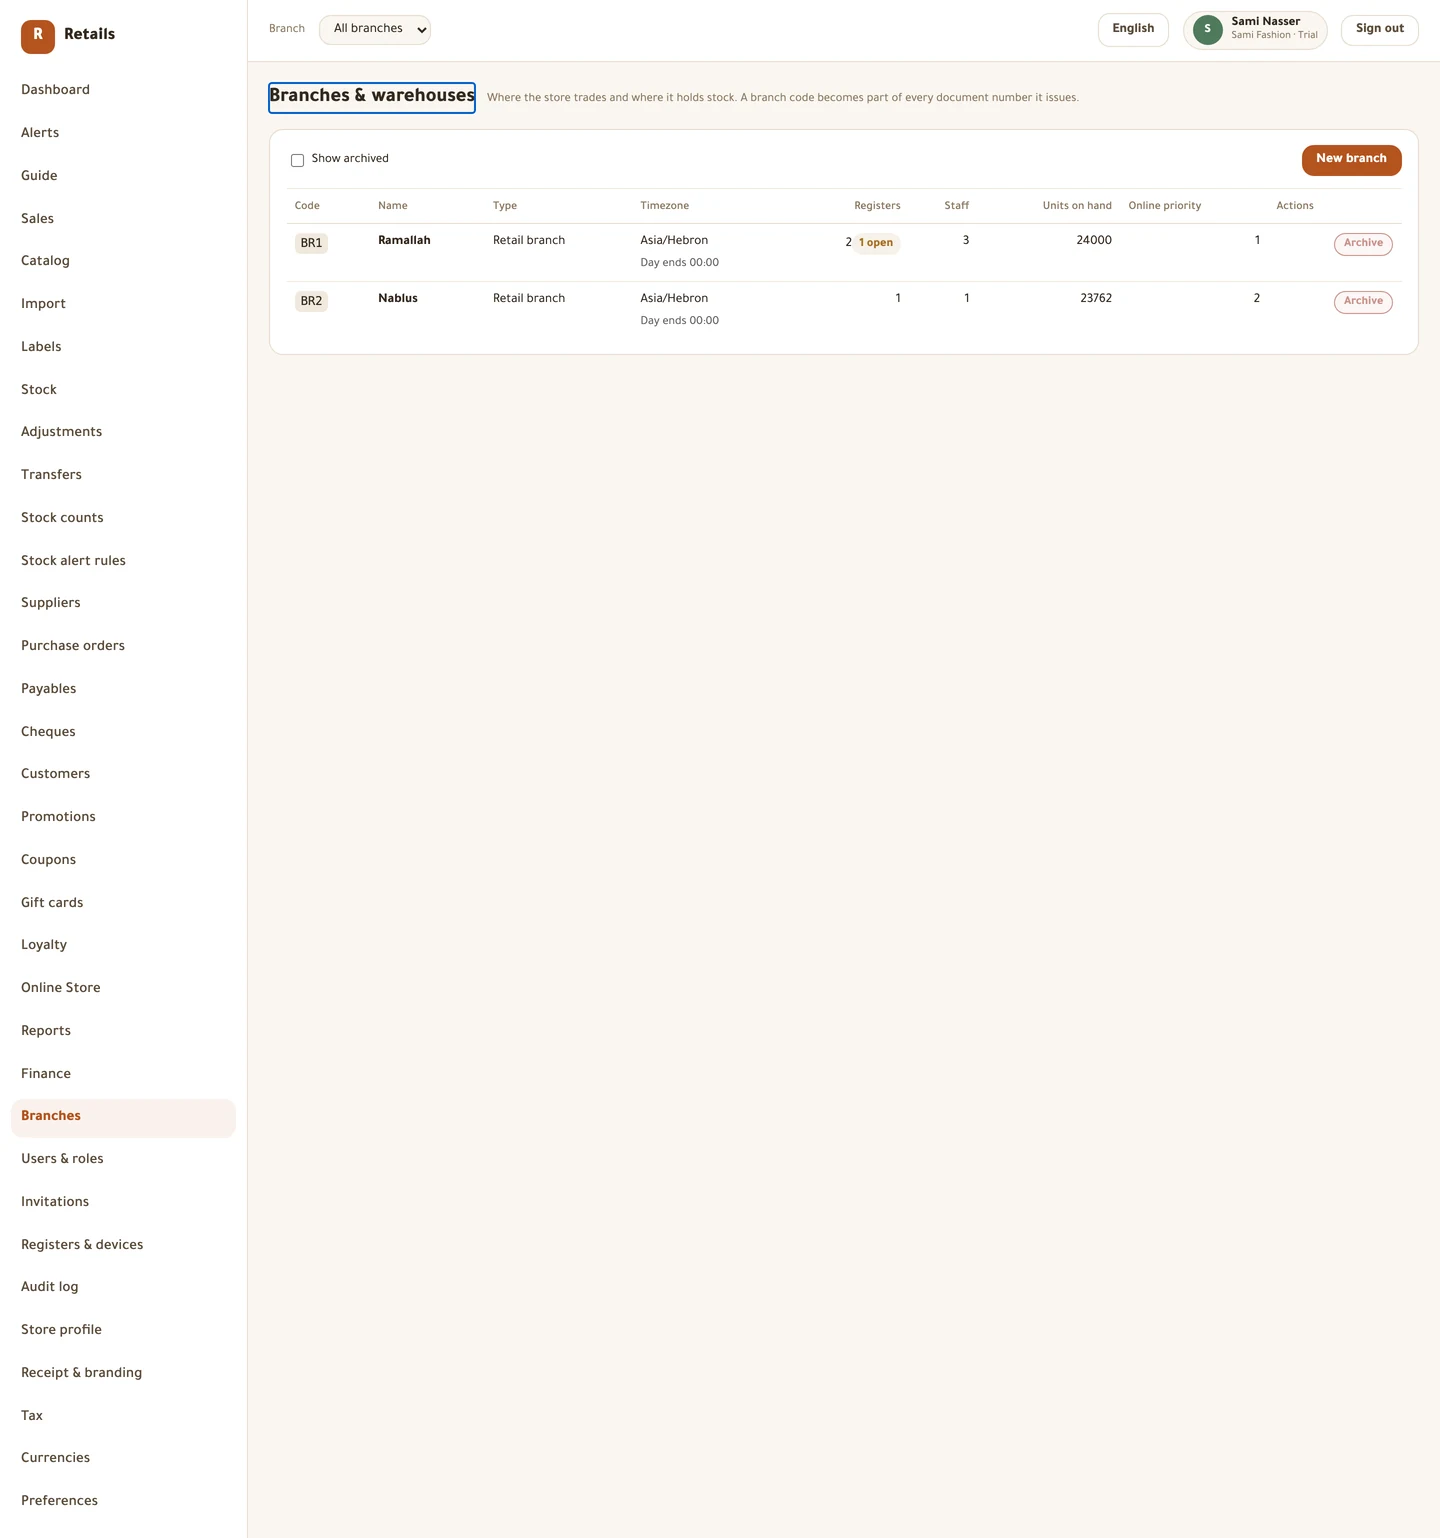
- Open Branches from the side menu and press New branch.
- Type the Code — up to 8 letters and digits, e.g.
BR1. - Fill in Name (English) and Name (Arabic). Both are required: the name is shown to staff and shoppers in their own language.
- Set Type. A Warehouse holds stock but has no point of sale; a Retail branch has both.
- Set the Timezone and, if this branch closes later than the rest, its own Business day ends at.
- Fill in Address and Phone.
- Press Save.
Online allocation priority
The Online allocation priority box decides which branch fills an online order first — lower runs first.
Set it now if you know the answer. It costs nothing and saves a pass later.
Two branches with the same name
The list flags a Duplicate name. It is allowed, but staff will have to tell the two apart by code, so give them different names if you can.
Duplicate codes are refused outright — they are what makes document numbers unique.
Closing a branch
There is no delete. The button says Archive, and the confirmation says why: the branch keeps its history and still appears in past reports.
The button stays disabled while anything is in the way. A branch that still holds stock has to have it transferred out or written off first, a register with an open shift has to close it, and you cannot archive the last active branch — a store needs at least one.
Do this
- Tick Show archived to see branches that have been closed.
- Press Reactivate on an archived branch to bring it back.
The registers list
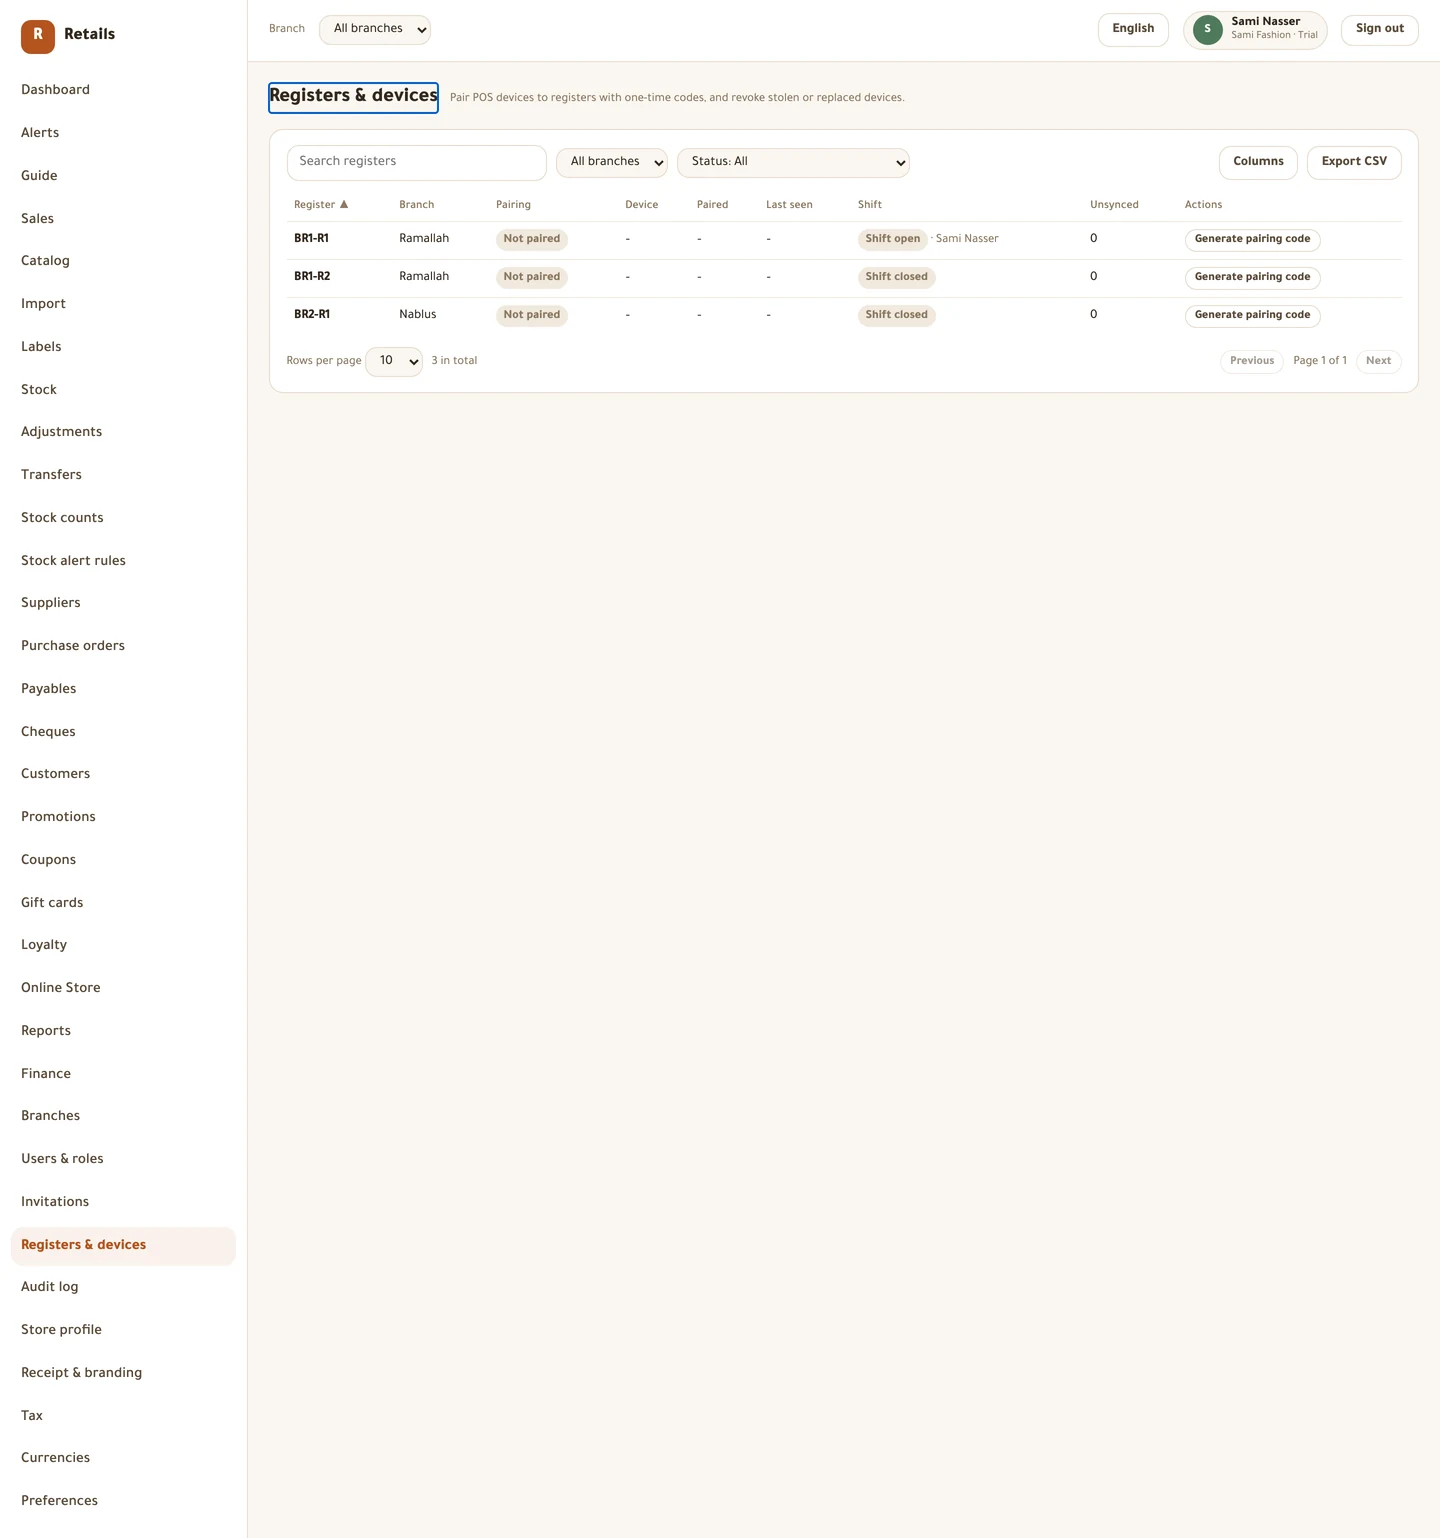
Open Registers & devices. Each row is one till: which branch it belongs to, which device is paired to it, when it was last seen, whether a shift is open, and how many sales it has not yet sent up.
Search, filter by branch and by pairing status, choose your columns, and export the list as CSV.
Pair a device
A pairing code is how a POS device proves it is allowed to be this register. You generate it here and type it there.
Do this
- Find the register's row and press Generate pairing code.
- Confirm. The code appears once, in the shape
ABCD-EFGH, with no 0, O, 1 or I in it — somebody reads it off one screen and types it on another. - Write it down now. Only its fingerprint is kept; if you lose it, generate another. Nothing is harmed.
- It expires after ten minutes, so generate it while you are standing at the till.
- On the device, enter your store's short address —
sami-fashionfor the test store — and the code. - The register is now paired. Sign in with a staff PIN.
Replacing or losing a device
Press Generate pairing code on a register that is already paired and you are offered a Generate takeover code instead. The old device is locked out at its next contact; its open cart is parked and any sales it has not sent are kept, not thrown away.
Revoke device is stronger, and it is what you use for a till that was stolen. The device is deactivated at its next contact and wipes its local encrypted data. If it is offline right now, that happens when it reconnects.
Before you move on
- Every shop and warehouse exists, with a code you are happy to live with
- Every branch is named in both Arabic and English
- Timezone and business-day cutoff set per branch
- At least one register shows as paired and recently seen
- You know the difference between a takeover code and revoking a device
Every picture on this page is a photograph of the real screen, taken from a running store.